
I put in considerable amount of time and energy into training my body; week after week, year after year. So naturally I want to make damn sure I keep making actual, tangible progress.
It can, however, be tricky to track this. Especially with the constantly varied aspect of CrossFit.
But I’ll show you how!

You probably train multiple times per week but annoyingly your progress between one session and another is often too small to notice. You won’t add ten kilos to your squat or cut your Fran time by a minute over night. Only when comparing over a longer period of time can we see change.
This is one of the biggest reasons we should all keep track of our training – you’ll have to deposit hard work to your fitness account way more often than you can withdraw results from it.
Having numbers to show yourself that you’re making progress will help a lot with your motivation.
Other times you’re actually not making any progress at all, but get stuck at a plateau. Keeping track helps you detect this, so that you can course-correct and start making gains again.
Progress towards goals
Progress is always made towards something specific. That might sound obvious but it’s worth stating – if you don’t know what goal you’re aiming for, how can you tell if you’re getting closer?
Your goal can be a lot of different of things, from some more fuzzier ones like “get stronger” or “become leaner”, to more particular ones like “learn double-unders” or “get my first pull-up”.
Whatever it is, you need to define it and then find a way to measure your progress towards it.
“If you can not measure it, you can not improve it.”
- Lord Kelvin
By measuring and tracking our progress we can connect our training with our results, to learn what actually gives some bang for our sweaty bucks, and what we can stop doing (like bosu ball squats).
CrossFit progress
When it comes to CrossFit specifically, people’s goals most often falls into one of four categories:
Strength – the foundation for all athleticism, determined by your muscle mass and neurological ability to switch them on to apply force.
Work capacity – your aerobic or anaerobic ability to regenerate, store and efficiently use energy.
Skill – your learned ability to carry out a task, often within a given amount of time or energy.
Composition – your naked aesthetics. Important to some people, for some reason.
I use these categories because they have different ways of measuring progress, nothing else. You can, for example, burn lots of fat (composition) and learn to master double unders (skill) at the same time by dedicating a month to the skipping rope. It’s just that their progress is measured differently.

Tracking strength progression
Strength is often measured by the weight you can lift for a given number of repetitions.
Most common is the 1RM – One Repetition Max. This is basically what people mean when they ask “so, what do you bench?” The maximum amount of weight your can lift once.
Other common measurements are 5RM and 3RM. Five because that’s the number of repetitions in most beginners programs and three because it’s closer to your 1RM, without you having to actually test for your 1RM. Fewer repetitions means you can lift heavier weights.
You can use online calculators to get an idea of what you’d be able to lift in different reps. While they’re of course not 100% correct all the time, they can give a useful estimate.
Strength is very easy to quantify. That’s why with beginners programs we can use something called linear progression, where you keep all other variables the same (reps, sets, exercise, tempo, etc) but keep adding weight to make it heavier every session.
Starting Strength and StrongLifts are two examples of this. You start lifting X kg for five reps and three or five sets. If you manage that you add a little more weight for next time. Once you fail a weight a few times in a row you decrease and start working your way up again.
For example, below’s my squat progress for the last three months. My previous 1RM was 121 kg and now my 5RM is 135 kg, which gives me an estimated new 1RM of 152 kg – a 31 kg increase!

I track my strength progress using an app with the fitting name Progression.
(NB: It’s listed amongst my fitness apps, if you’re curious about what else I have installed.)
You could also go old school and use pen and paper or pick the middle road with a spreadsheet. Just make sure to note down the day, exercise, weight, reps, and sets.
2016-04-12 Squats 5x3 @ 100 kg
2016-04-14 Squats 5, 3, 2 @ 110 kg
Tracking work capacity progression
Most WODs aren’t focused on building strength, but to aims primarily to improve our work capacity.
It’s easy to quantify a result from each WOD – AMRAPs have a rep count, RFTs have a time, etc. But tracking their progress isn’t that easy.
How do you compare an AMRAP of seventy reps with an RFT of seven minutes?
You don’t!
You compare the same workout with itself, some time later. This is the reason we have benchmark WODs – The Girls, Heroes, and Challenges. With a unified set of WODs we can add them in every now and then to see if we’ve improved since last time.
This also gives you a target to beat. If you did Karen (150 wall balls for time) with a 4 kg med ball last time, maybe it’s time to try it with a 5 kg med ball when you do Karen again two months later?
Always try to increase the intensity every time you test a benchmark WOD. Either go heavier, faster, deeper, or whatever other variable you can tweak to make it harder.

Recently I’ve personally started using Wodboard to keep track of my results but you could of course go for whatever makes sense to you. Just note down the date, weight, scaling, and result.
2016-04-12 Fran (30 kg, red band pull-ups) 13:37
2016-04-14 Karen (5 kg) 17:21
Tracking skill progression
Skills, in a CrossFit setting, includes exercises like double-unders, handstand walking, rope climbing, muscle-ups, the olympic lifts, etc.
I struggled a lot learning the double-under, so I decided to come in fifteen minutes early for each class just to practice them. It still took me over a month but finally it just clicked and could do them.
While most of them look like they’re binary – you either can do them or not – that’s not really true. With any one of them you can break it down to a progression ladder and advance through the different phases.
Your coach can probably help you with this but here’s some examples:
Double-unders. First phase would be skipping normally and on the count of five you swing hard, jump a little higher, and pull the rope around you twice. That’s your first double-under. Second phase could be to learn to continue skipping normally after the DU and in the third phase you could try to decrease the single unders between each DU.
Handstand walking. In phase one you’d learn to kick up to a handstand and lean with your feet against a wall. Once you got that down you could push yourself out a bit and try to balance on your own.
Muscle-ups. Getting your first pull-up (chest to bar) is key here, as is having enough strength to do a ring dip. Once you have that, you could learn pull-ups with the false grip and then you continue to practicing the transition.
There’s a whole science behind gymnastics progressions but I want to leave you with the idea of breaking it down into components and phases. You go through each of them until you can start practicing the full movement itself.
I recommend just picking one skill to start with and practicing only that. For me, right now, that’s handstand walks and I don’t really need to write that down to remember my progress.
Tracking composition progression
Finally, let’s talk about tracking your aestethics progression – training to look good naked.
Most CrossFitters would say that’s not functional fitness and they’d never be that vain but of course that’s complete bullshit. That’s best left for another article though.
As for the progress, it’s different for different people. Some are skinny, some are fat, and some are somewhere in between. However, what we pretty much all got in common is that we want to gain or maintain muscle while losing fat.
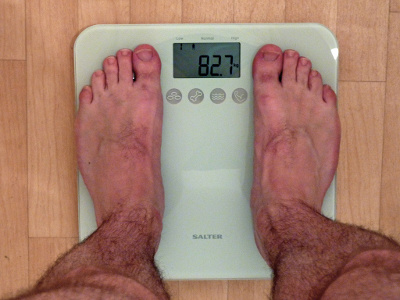
The terminology is important here – we don’t want to lose weight, we want to lose fat.
When you step on the scale you only see your weight and have no idea how much of that is muscle, fat, or water. These levels can all fluctuate and so if you’ve worked hard to lose some fat but meanwhile retained some water, that progress might be completely hidden from you.
That’s why we need to track fat and fat-free mass separately.
(NB: Perhaps you have a fancier scale that can measure fat? Don’t trust it. That’s called bioimpedance – bioelectrical impedance analysis – and it’s very unreliable.)
Get a cheap caliper and use it to measure your skin folds. After tapping the measurements into an online calculator you’ll see your body fat percentage.
For simplicity, let’s say you came out with 20% body fat, while weighing 100 kg. That means you have 20 kg fat. Next time you might find yourself at 101 kg with 19% body fat. While you gained weight you actually dropped to (101 * 19% =) 19.2 kilo body fat. Progress!
2016-04-12 100 kg, 20% bf (20 kg)
2016-04-14 101 kg, 19% bf (19.2 kg)
Train more than test
While it’s helpful to test, measure, and track, we need to remember the most important part of making progress – actually training. If you’re only testing, you’ll soon stop progressing at all.
So decide on a goal and make a plan for how to get there. Then execute on it, while tracking your progress to make sure that you’re moving in the right direction.
That’s how you get ‘em gainz!
